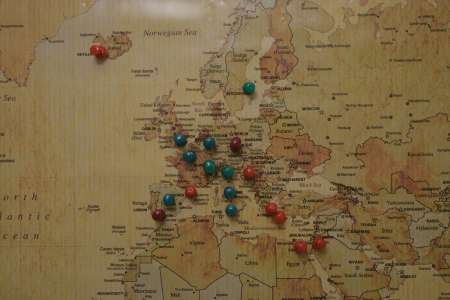
Every so often, I feel like travelling the world. Seeing I’m not in a rush to travel the world in one go, and inspired by “The Most Beautiful Places in The World” on Facebook, I started listing all the places I want to visit…. As you can guess, it starts off a little difficult, but boy did I get on a roll, my list quickly grew!
Quite quickly, the idea of a world travel map came to mind – one with green pins where I’ve been and red pins where I haven’t been yet. I had seen some online on Amazon or Ebay, and on online tutorials, and I quite fancied having my own, to see every day when I am home, and to keep the dream of travel alive.
A quick Google search taught me that you can buy these maps ready made, framed even, ready to be put on your wall. But where is the fun in that?
What you need:
- 90 x 60 cm cork board from my local hardware store
- 90 x 60 cm vintage style world map (from Amazon), which came with instalment hooks
- Red & Green pins
- White arts & crafts glue
- Ribbon (optional) & Hook to put your finished product to the wall
How you make it:
If your world map arrives rolled up as mine did, I advise you to unroll it at least 1 day before so it flattens back out. This makes it so much easier to fix the map to the cork board at a later stage.
Place the now flattened world map on the cork board, and measure any excess to be trimmed off. Double check the excess to be discarded and remove it.
Use your normal white arts & crafts glue to affix the map on the cork board. Leave to dry.
In mean time, sort your pins into red and green pins. Red stands for places to go, Green stands for where you have been already. Also make a list of cities where you have been and where you’d love to travel to. Here you can also chose to indicate every single city or if you’d like to stick to countries or capital cities only.
When your map is safely glued to the board, it is time to start pinning the cities. I used regular green and red pins, same style as the ones that came with the board, but you could also used the finer round tip ones, if you’ve been to many places in the same region, e.g. if you’ve visited most of the larger cities in Spain (Madrid, Barcelona, Valencia, Granada, Sevilla…) a lot of pins will go there.
The hard part for me was to screw in the installation hooks that came with the board. These are these little eyelet screws that you screw into the frame. The first one went in fairly smoothly, the second however…let’s say it was a lot less cooperative then the first one!
Attach your ribbon (optional, I picked a nice red one) to the eyelets, and attach to the wall.
My next trip will make me remove a couple of red pins and exchange them for green ones – I’m off to Croatia, Montenegro and Bosnia, on a photography tour, later this year.
Where will your map take you next?

